
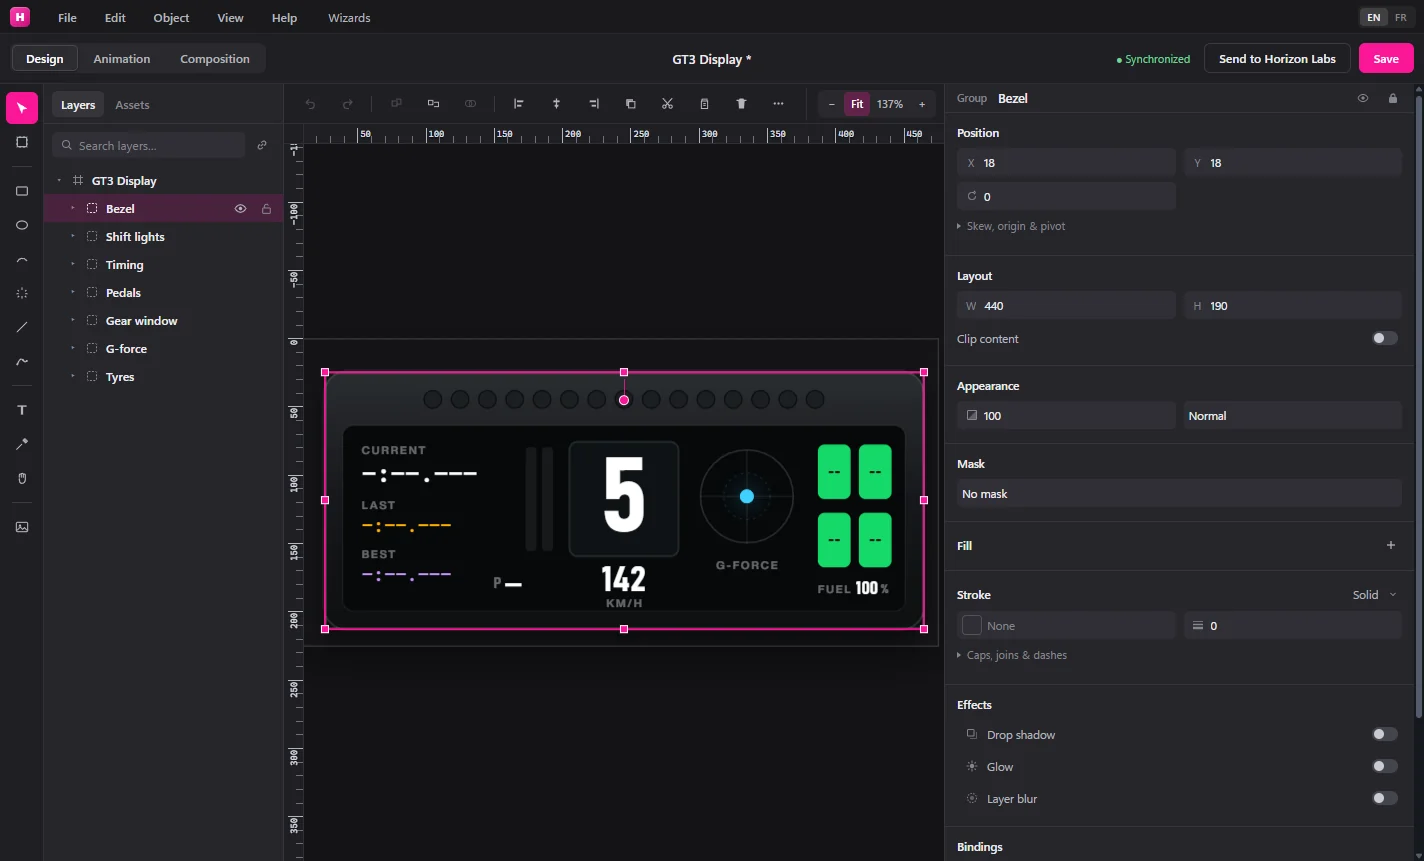
The quickest route to a GT3-style HUD is the GT3 Display example in the Designer’s Example store: a wheel-display layout with a carbon bezel, a row of shift LEDs, a lit gear window, pedal traces, a g-force puck and four tyre temperatures. Open it, change what you want, check it in Animation mode and press Send to Horizon Labs.
1. Start from the example
- Open the Designer. On the welcome screen, find Example store and filter by Assetto Corsa.
- Open GT3 Display. It is written for Assetto Corsa Competizione and binds only fields the game sends.
- Prefer to start smaller? The welcome screen also has Start from a template, with style chips (All, Neon, Minimal, Rally, Retro) and layout chips (Radial gauge, Shift strip, Speed stack, Pedals). The Shift strip layout is the natural one to try for an LED row. Both routes are covered in your first HUD in the Designer.
2. Read the layout
Select layers in the Layers panel. The example uses these parts, named in the layer tree:
- Shift lights
- Fifteen circles named LED 1 to LED 15. The first five light green, the next five red and the last five blue, in that order as RPM climbs.
- Gear window
- A rectangle named Gear window with the Gear text over it. The gear turns blue and the window outline turns blue near the limiter.
- Speed
- A Speed text and a Speed unit label that follow the speed unit set in Horizon Labs.
- Timing
- Current, last and best lap times, plus race position.
- Pedals
- Throttle and Brake bars driven by smoothed values.
- G-force
- A ring with a puck that moves with lateral and longitudinal G.
- Tyres
- Four rectangles, FL, FR, RL and RR, coloured by core temperature, with the value on top. A Fuel readout sits underneath.
The Designer’s field list has current, last and best lap but no lap-delta field, so the example shows those three times instead of a delta. Each game sends its own set of fields: check the list on the Assetto Corsa page, since a field your game does not send is flagged in the Designer and stays still in the game.
3. Draw and edit
In Design mode, the left rail holds the tools: Select, Frame, Rectangle, Ellipse, Arc, Ticks, Line, Pen, Text, Eyedropper and Hand. The action bar aligns, groups, arranges and combines shapes (Union, Subtract, Intersect, Exclude). The Inspector sets fill, stroke, type and effects. Import your own PNG, SVG or font files from the Assets panel.
A GT3 look comes from restraint: a dark bezel, one accent colour per job (green, red and blue for the LEDs, white for the gear) and condensed numerals. Change the bezel and screen shapes first, then the colours.
4. Bind to telemetry
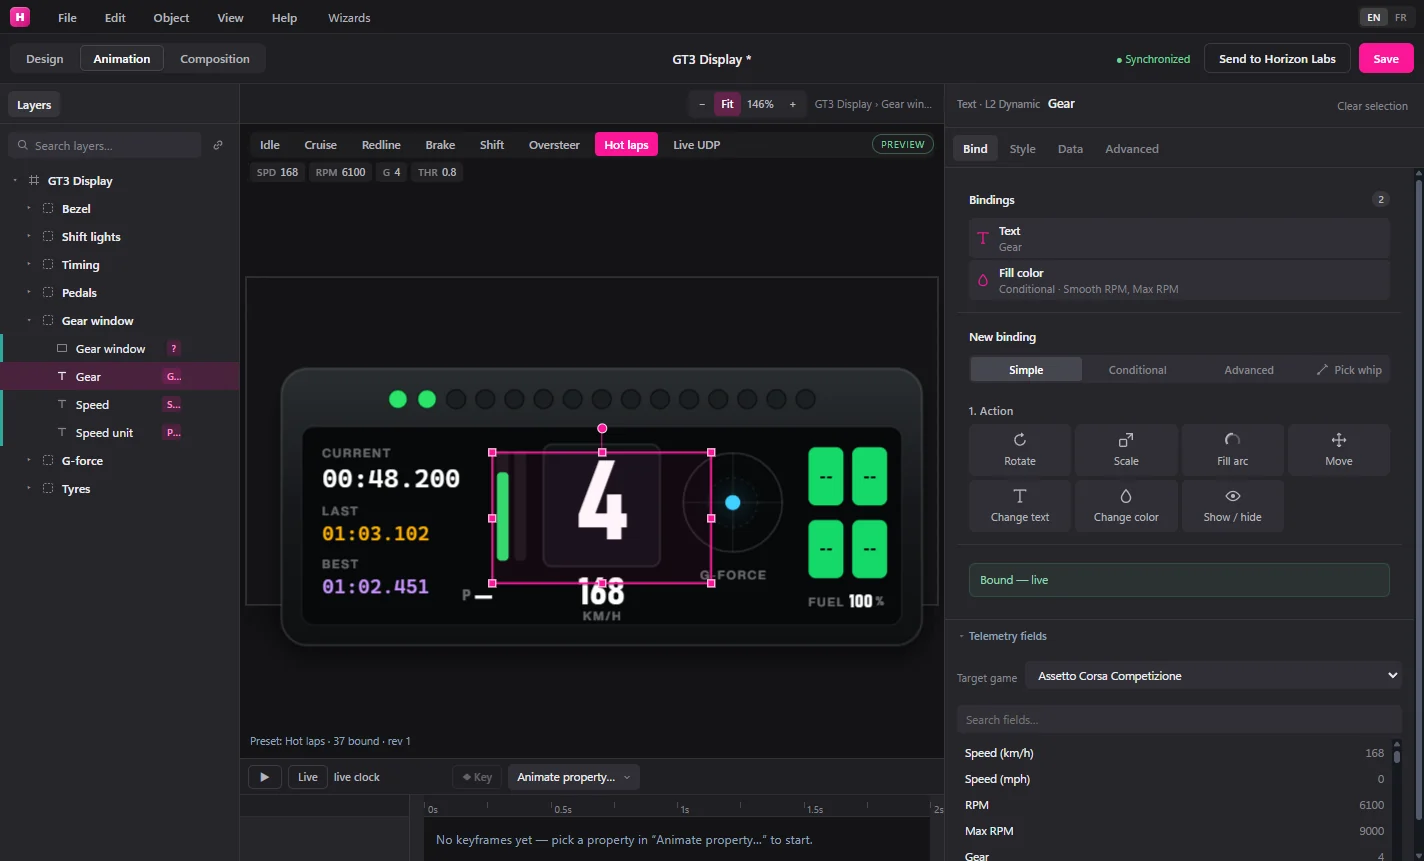
Press Go to Animation to switch from Design to Animation. Select a layer, open the Bind tab and choose how to bind:
- Pick whip. Click a telemetry field or layer on stage to wire it up.
- Guided binding. Pick an action (Rotate, Fill arc, Move, Change text, Change color, Show / hide), then the telemetry field, then a preset. Presets include RPM needle, Gear text, Speed text (km/h), Redline colour switch and G-force position.
- Conditional. A When / Then / Else rule, which is how the LEDs work: each one turns on when RPM, as a share of the limit, passes its threshold. The example computes that share from smoothed RPM and max RPM.
- Advanced. Free-form expressions that can use fields like
$gForceLator$smooth.rpm.
The Bind tab shows live values and warns when a field is missing from the current telemetry, and the telemetry field list marks fields your game does not send.
5. Add spring motion on RPM
Select a layer, for example a needle or a bar, and scroll to Spring animations at the bottom of the Bind panel. Press Add spring animation, then set:
- Property, such as
transform.rotation(the default). - Channel, such as
rpm,throttle,driftAngle,gLatorgLong. - Expression, which defaults to the channel’s smoothed value, for example
$smooth.rpm. - Stiffness and Damping. Leave them empty to use the channel’s default profile.
The LED row in the example already reads the smoothed RPM value, so it eases rather than jumps. Use the Keyframe timeline for fixed animations, such as a flash when RPM nears the limiter.
6. Preview and send
Use the telemetry presets (Idle, Cruise, Redline, Brake, Shift) to check every state without a game running. Switch to Live UDP to see the HUD driven by real telemetry from a running game. Then press Save to keep the file, or Send to Horizon Labs to install it. The toast tells you if it is already on your overlay, will appear when Horizon Labs starts, or has to wait until the next start.
Good to know
- Put the HUD on stream with the OBS browser source.
- Wondering how it compares with other tools? See Horizon Labs vs SimHub.